A Christmas village display instantly brings festive magic into your home, no matter your space or budget.
Whether you’re decorating a large table or a tiny corner shelf, these easy DIY ideas help you create a cozy, enchanting scene with pieces you already own or inexpensive finds.
Here are 17 Christmas village display ideas DIY easy, each explained in detail to help you set up a beautiful holiday wonderland.
1. Wooden Crate Village Display
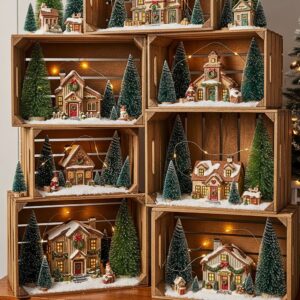
Stack wooden crates horizontally or vertically to build a tiered display wall.
Add battery lights inside the crates, then place your village houses at different heights.
For extra charm, line the edges of each crate with faux snow.
This setup is easy to rearrange and perfect for small spaces.
2. Farmhouse Tray Village Scene
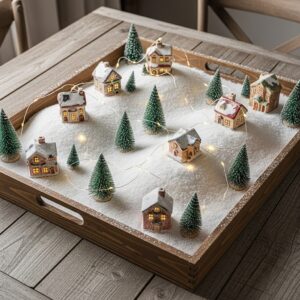
Use a large farmhouse-style tray as a base to create a portable mini village.
Layer the bottom with soft snow blanket fabric, then add small houses, mini trees, and bottle-brush accents.
Because the tray is moveable, you can use it as a table centerpiece or shift it around your home.
3. Tiered Stand Christmas Village

Turn a two- or three-tiered stand into a vertical Christmas village.
Cover each tier with faux snow and string tiny fairy lights around the poles.
Place small figurines, tiny houses, and mini wreaths on each level to make a cascading winter scene that’s charming and compact.
4. Bookshelf Christmas Village
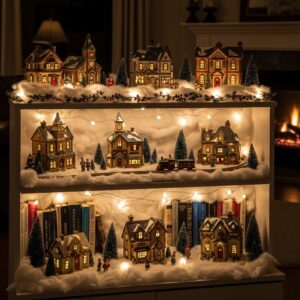
Clear off a few shelves and turn your bookcase into a magical display.
Layer each shelf with cotton snow, add houses, and tuck LED lights behind books to illuminate the village softly.
This idea is great for adding holiday cheer without using extra furniture space.
5. Window Sill Winter Town
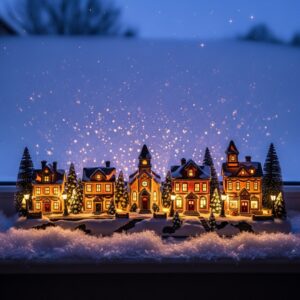
Transform your window sill into a glowing Christmas town.
Position houses so light shines through them at night, giving your home a warm glow visible from outside.
Add icicle garland or snow spray around the edges for a frosty finishing touch.
6. Mirror Base Reflective Village
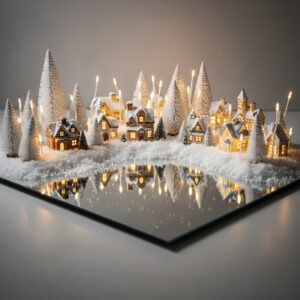
Place your miniature houses on a large mirror to create a reflective, snowy landscape.
The mirror doubles the glow of your village lights and gives the illusion of a sparkling frozen pond.
Add white trees, figurines, and glitter snow for a magical icy effect.
7. DIY Cardboard Houses

If you’re decorating on a budget, craft your own houses from cardboard.
Cut simple shapes, paint them white, and add windows using craft knives.
Place a battery tea light inside each one to create a soft, glowing village.
This is a kid-friendly craft and perfect for customizing the size and style.
8. Kitchen Counter Holiday Village

Clear off a part of your kitchen counter or island and build a tiny village scene that greets you each morning.
Use a runner or piece of burlap as a base, then layer with faux snow and small ceramic houses.
Add mini wreaths or gingerbread figurines to tie in a cozy kitchen theme.
9. Floating Shelf Christmas Village
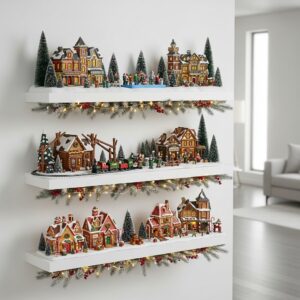
Use floating wall shelves to create rows of mini houses.
This vertical layout makes your village look larger while keeping surfaces clutter-free.
Wrap battery-operated lights along the shelf edges, and add greenery or garland for a festive border.
10. Snow Globe Jar Village

Place tiny houses or trees inside glass jars to create DIY snow-globe-style displays.
Add a sprinkle of faux snow at the bottom, place your figurines, and light each jar with small fairy lights.
Arrange several jars on a table for a whimsical, glowing scene.
11. Under-the-Tree Mini Village

Decorate the space under your Christmas tree with a small village to create a magical woodland setting.
Add houses between your gifts, and surround them with tiny animals, faux snow, and a few string lights.
This works especially well for trees with a rustic or woodland theme.
12. Mantel Christmas Village Display

Use your fireplace mantel as a long canvas for your holiday village.
Cover it with garland and snow blanket fabric, then place houses of varying heights along the length.
Add twinkling lights, pinecones, and tiny sled figurines for extra detail that creates a full winter scene.
13. Light-Up Ladder Display
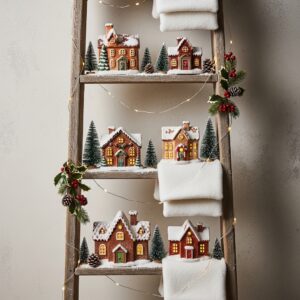
Lean a wooden ladder against the wall and turn each step into a shelf for your village.
Add snow blankets, string lights through the rungs, and place figurines or mini houses on each step.
This gives height to your display and brings a rustic farmhouse feel to your decor.
14. Rustic Wooden Plank Village

Lay a long wooden plank across a console table or fireplace hearth.
Arrange your houses in a straight line, making a simple but elegant display.
Add faux greenery, candles, and snowflakes for a more decorated finish while still keeping the rustic charm.
15. Fireplace Hearth Village Scene
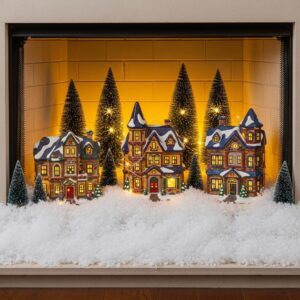
If you have an unused fireplace, turn it into a magical Christmas village nook.
Cover the bottom with thick snow fabric, add larger houses, and position trees or lamppost figurines around them.
Soft lights give this space a cozy glow that makes the whole room feel festive.
16. Under-a-Cloche Mini Village
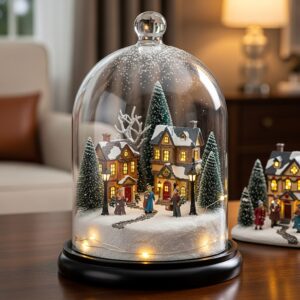
Create a beautiful tiny winter scene under a glass cloche.
Place a small house or a few trees on a wooden base, sprinkle snow, and set the cloche on top.
Display multiple cloche villages on a sideboard or dining table for an elegant, high-end look.
17. Christmas Village on a Coffee Table
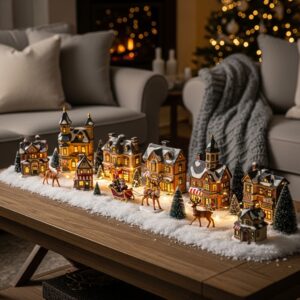
Turn your coffee table into the centerpiece of your holiday decor.
Use a large runner or snow blanket as your base, add houses, mini trees, reindeer, and lights, and create natural pathways using faux snow.
This arrangement invites guests to admire the scene up close while keeping your living room festive.
These 17 Christmas village display ideas DIY easy give you plenty of inspiration to build a cozy, magical winter town in your home.
Whether you prefer a rustic farmhouse look, a budget-friendly cardboard craft, or a glowing mantel scene, each idea can be adapted to fit your decor style.
Mix and match displays, add twinkling lights, and have fun creating the holiday village of your dreams.