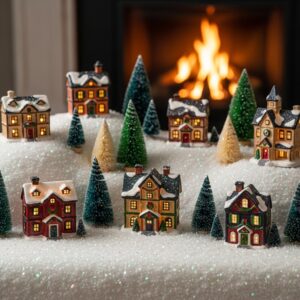
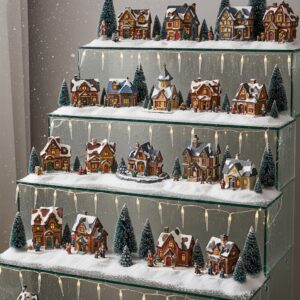
A snowy Christmas village display instantly brings that dreamy holiday feeling into your home.
With a few simple materials—fake snow, lights, and miniature décor—you can transform any tabletop, mantel, or corner into a cozy winter wonderland.
These 17 DIY Christmas village display ideas with snow will inspire you to create a charming and sparkling festive scene this season.
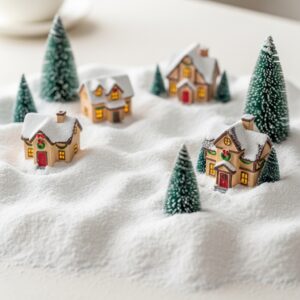
1. Snow Blanket Village
Start with a base of thick snow blanket or quilt batting to mimic freshly fallen snow.
Spread it evenly across your table or shelf, gently ruffling edges to form soft hills.
Place your ceramic or wooden village houses on top and tuck LED lights under the snow to make it glow from beneath.
Sprinkle iridescent snow dust for a magical shimmer.
2. Epsom Salt Snow Display
Epsom salt makes perfect, realistic snow that sparkles under light.
Pour a layer over a tray or wooden board, then gently press your village houses into it.
You can even mix a few drops of silver glitter with the salt for extra shine.
This method works beautifully for centerpieces or under glass domes.
3. Shimmering Cotton Snow Hills
Create small snow mounds using rolled-up cotton batting or polyester stuffing. Shape gentle slopes and valleys, then dust the tops with white glitter.
Position your houses, trees, and figurines at varying heights to create a layered, lifelike winter landscape.
4. Snowy Mirror Lake Scene
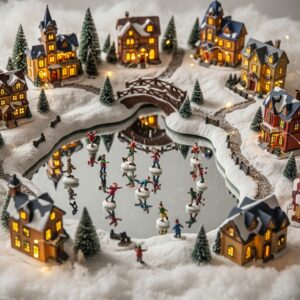
Use a round mirror as a “frozen lake” in the center of your village.
Surround it with fluffy snow made from white felt or fake snow spray.
Add tiny skaters or a wooden bridge across the “ice.”
The reflection gives your display depth and sparkle, making it look like a true winter village.
5. Baking Soda Snow Base
For a DIY snow that’s soft and moldable, mix baking soda with a bit of white hair conditioner until it forms a fluffy texture.
Spread it over your display surface, then press houses and figurines into it.
The mixture looks like fresh snow and smells clean and pleasant.
6. Frosted Glass Village Scene
Arrange your mini houses inside or on top of frosted glass jars.
Fill the bottoms with faux snow and add fairy lights inside.
The frosted glass diffuses the light beautifully, creating a glowing snowy atmosphere perfect for mantels or side tables.
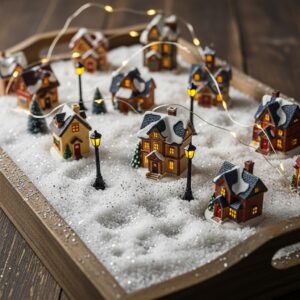
7. Wooden Crate Snow Village
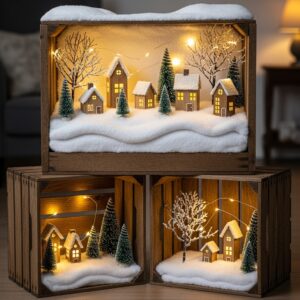
Turn a rustic wooden crate on its side and line the inside with white batting or felt snow.
Add small houses, trees, and fairy lights inside the crate for a cozy, enclosed snowy scene.
Stack multiple crates for a tiered display that’s easy to rearrange.
8. Snow Globe-Inspired Dome Display
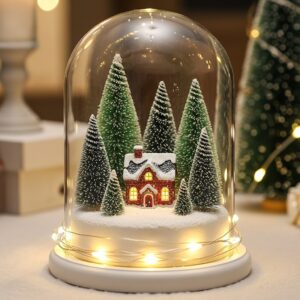
Place a small section of your village inside a glass dome or large clear vase.
Fill the base with fake snow, mini bottle-brush trees, and a house or two.
Shake gently for a snow globe effect, then place it under warm light to make it sparkle.
9. Window Sill Snowy Village

Decorate your window sill with a row of miniature houses sitting on a layer of snow blanket.
Add snow spray to the window glass itself to look like frost.
Let the natural sunlight or your indoor string lights shine through for an ethereal, glowing effect.
10. Snowfall-Inspired LED Curtain Display

Hang an LED snow curtain behind your village setup.
Use cotton or snow batting on the base and scatter snowflakes made of tissue or paper overhead.
The cascading lights mimic gentle snowfall, creating an enchanting display that looks beautiful day and night.
11. Snowy Forest Backdrop
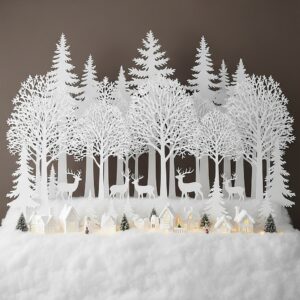
Cut out a snowy forest silhouette from white cardstock or foam board and place it behind your display.
Sprinkle fake snow along the backdrop’s base, and position trees and deer figurines in front.
The layered scene adds realism and depth to your Christmas village.
12. Spray Snow on Glass Shelves
If you display your Christmas village on glass shelves, spray artificial snow lightly across the glass edges and corners.
It creates a frosty look that blends seamlessly with snow below the houses.
Add small icicle lights to complete the wintry feel.
Read More: 17 Christmas Village Display Ideas DIY Easy
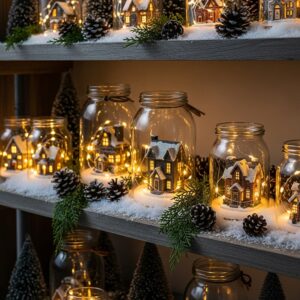
13. Mason Jar Snow Village

Fill wide-mouth mason jars with fake snow, then place a single house, tree, or car ornament inside each one.
Close the lids and line them up on a shelf or mantel.
When you add fairy lights behind them, they look like tiny glowing snow globes.
14. Snow-Covered Train Village
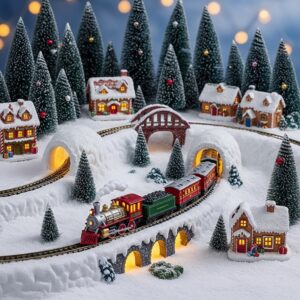
Add a model train that winds through a snowy landscape made from snow blanket and sprinkled glitter.
Use small tunnels and bridges built from cardboard and covered with fake snow paste.
This moving element makes your display interactive and whimsical.
15. Snowy Mountain Village

Build small hills using Styrofoam blocks or cardboard boxes, then cover them with snow blanket or white felt.
Arrange your houses on different heights to form a snowy mountain town.
Decorate the edges with pine trees, fake snow, and mini lanterns for a realistic alpine vibe.
16. Snow-Tipped Roof Detail

Use white textured paint or lightweight spackle to add “snow” to the roofs of your miniature houses.
Apply with a small brush, then sprinkle glitter while it’s still wet.
It’s an easy way to make your existing village pieces look freshly dusted with snow.
17. DIY Falling Snow Effect

Suspend clear fishing line above your village and attach small cotton balls or glitter snowflakes to mimic falling snow.
Hang a few LED fairy lights among them to catch the sparkle.
This trick adds motion and magic to your entire snowy scene.
Creating a DIY snowy Christmas village doesn’t require expensive supplies—just imagination, a little craft time, and some fake snow.
Whether you prefer a sparkling Epsom salt base, a frosted forest backdrop, or a cozy crate village, these 17 DIY snow display ideas will help you build a winter wonderland right in your home.
Your snow village can become a holiday favorite—one you’ll love setting up and admiring every Christmas season.