Raising backyard chickens is becoming more popular than ever.
Fresh eggs, sustainable living, and the joy of caring for hens make it an exciting hobby.
But before you bring home your feathered friends, they’ll need a safe, comfortable, and functional coop.
The good news? You don’t need to spend hundreds of dollars on a pre-built model—you can build one yourself!
In this guide, we’ll cover DIY chicken coop plans for beginners, including what to consider before building, essential materials, and simple step-by-step instructions.
Why Build Your Own Chicken Coop?
Creating your own chicken coop allows you to:
-
Save money – Store-bought coops can be costly.
-
Customize size and style – Fit the coop to your flock and yard space.
-
Ensure quality and safety – Stronger builds mean better predator protection.
-
Learn valuable skills – A fun project for DIY lovers.
Things to Consider Before Building
Before picking up your tools, think about:
-
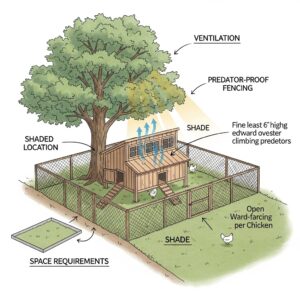
Flock size – Plan for at least 2–3 square feet per chicken inside the coop and 8–10 square feet per chicken in the run.
-
Location – Choose a dry, shaded spot with good drainage.
-
Ventilation – Chickens need airflow to stay healthy.
-
Predator-proofing – Use hardware cloth (not chicken wire) to keep out raccoons, foxes, and hawks.
-
Ease of cleaning – Removable trays, wide doors, and proper spacing make maintenance easier.
Materials You’ll Need
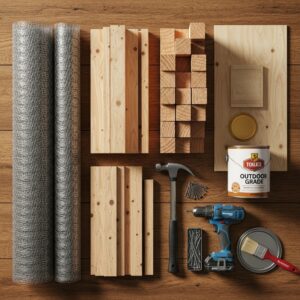
Here’s a simple list for a beginner-friendly chicken coop build:
-
Wooden pallets or 2×4 lumber
-
Plywood sheets
-
Galvanized hardware cloth
-
Roofing material (metal sheets or asphalt shingles)
-
Hinges and latches
-
Screws and nails
-
Saw, drill, and measuring tape
-
Non-toxic outdoor paint or sealant
Step-by-Step DIY Chicken Coop Plan for Beginners
Step 1: Build the Base
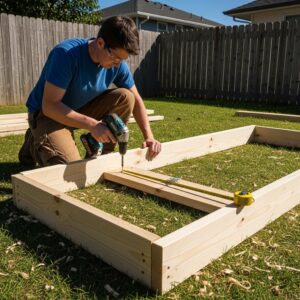
Start with a sturdy rectangular frame using 2×4 lumber. This will keep the coop elevated, preventing dampness and rot. Add floor joists and cover with plywood for a solid base.
Step 2: Construct the Walls
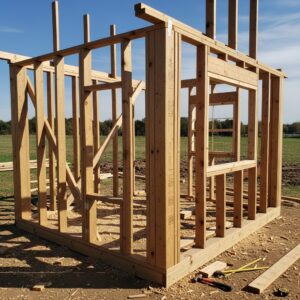
Frame the walls with 2x4s. Include cut-outs for doors, nesting box access, and windows for ventilation. Cover with plywood sheets.
Step 3: Add the Roof
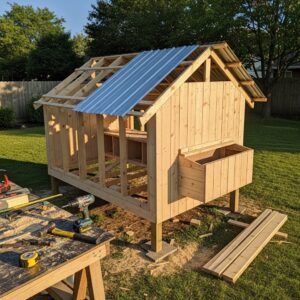
Attach slanted beams to allow rain runoff. Cover with roofing sheets or shingles for durability. Overhangs will help protect from weather.
Step 4: Install Doors and Windows
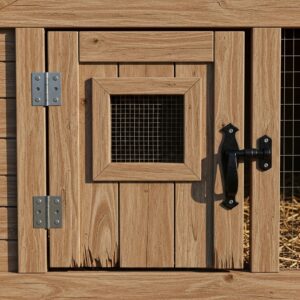
Use hinges to create an access door for cleaning and a smaller chicken-sized door for the flock. Add windows covered with hardware cloth for ventilation.
Step 5: Build Nesting Boxes and Roosting Bars
Inside the coop, build nesting boxes—about 12×12 inches each—one for every 3–4 hens. Add roosting bars higher than the boxes so chickens prefer sleeping on the bars, not in the nests.
Step 6: Predator-Proof the Run
Attach an outdoor run using wooden posts and hardware cloth. Bury the cloth at least 12 inches underground to keep predators from digging in.
Step 7: Paint and Seal
Finish by painting or sealing the wood with non-toxic, weather-resistant coating to ensure your coop lasts for years.
Extra Tips for Beginners
-
Add removable dropping trays for easier cleaning.
-
Install an automatic chicken door to keep hens safe at night.
-
Place feeders and waterers off the ground to reduce mess.
-
Use deep litter method (layering bedding like straw or pine shavings) for less frequent cleanouts.
Simple Coop Design Ideas for Beginners
-
Small A-frame coop – Great for 2–4 chickens, easy to move around.
-
Pallet coop – Affordable and sustainable by reusing materials.
-
Walk-in coop – Perfect if you want more space and easy access for cleaning.
Building your own chicken coop may seem intimidating at first, but with the right plan and materials, even beginners can create a safe and comfortable home for their flock.
Start small, keep it simple, and remember—your chickens care more about safety and comfort than fancy designs.
With these DIY chicken coop plans for beginners, you’ll be well on your way to fresh eggs and happy hens right in your backyard.
FAQs About DIY Chicken Coop Plans for Beginners
1. How many chickens can I keep in a beginner chicken coop?
A small DIY coop can comfortably house 3–5 hens. As a rule of thumb, plan for 2–3 square feet per chicken inside the coop and 8–10 square feet per chicken in the outdoor run.
2. What is the easiest chicken coop design for beginners?
An A-frame coop or a small pallet coop is the easiest for beginners. They require fewer materials, simpler cuts, and less building time while still keeping your flock safe and comfortable.
3. Can I use chicken wire instead of hardware cloth?
It’s not recommended. Chicken wire keeps chickens in, but it doesn’t keep predators out.
Use hardware cloth instead, as it’s much stronger and provides better protection against raccoons, foxes, and other animals.
4. How often should I clean my chicken coop?
For a small flock, spot-cleaning daily and a deep clean every 1–2 weeks works well.
Many beginners use the deep litter method, where bedding layers are added regularly and replaced every few months, reducing maintenance.
5. Do I need a permit to build a chicken coop?
This depends on your local zoning laws.
Some areas allow backyard chickens freely, while others may limit the number of hens or require a permit. Always check with your city or county before building.
6. What is the best bedding for chicken coops?
Popular options include pine shavings, straw, or sand. Pine shavings are most common because they’re absorbent, affordable, and easy to clean.
Avoid cedar shavings, as the oils can be harmful to chickens.
7. Can I move a DIY chicken coop once it’s built?
Yes—if you build a lightweight A-frame or mobile chicken tractor.
Larger coops with wooden frames are harder to move, so plan your location carefully before building.
8. Do chickens need heat in the winter?
In most climates, chickens are hardy and don’t need extra heat. A draft-free, well-ventilated coop is usually enough.
Supplemental heat can be dangerous, so only use it in extreme cold and with proper safety precautions.