If you love the idea of preserving flowers but don’t have weeks to wait, microwave drying is the perfect solution.
It’s fast, simple, and helps flowers retain much of their original color, shape, and texture.
Whether it’s a rose from a special bouquet or garden blooms you want to save, this guide shows you exactly how to dry flowers in the microwave—step by step.
🌼 Why Use the Microwave Method?
Traditional air drying can take up to a month and often causes flowers to lose color or droop.
Microwave drying, on the other hand, uses gentle heat to evaporate moisture quickly, locking in color and preventing petals from wilting.
Benefits:
-
Takes only a few minutes
-
Helps retain vibrant colors
-
Works great for small to medium flowers
-
Keeps petals fuller and more natural-looking
🌸 What You’ll Need
Before you start, gather the right tools and materials for safe, even drying.
Materials:
-
Fresh flowers (roses, daisies, zinnias, or chrysanthemums work best)
-
Microwave-safe container
-
Silica gel crystals (available at craft or floral stores)
-
Cup of water (to protect the microwave)
-
Paintbrush or small soft brush (for cleaning after drying)
Optional:
-
Scissors for trimming stems
-
Tweezers for gentle handling
🌷 Step-by-Step: How to Dry Flowers in the Microwave
Step 1: Prepare Your Flowers

Choose flowers that are just beginning to bloom — not fully open or wilted.
Trim stems short and remove any excess leaves. Pat them gently to remove surface moisture.
Step 2: Add Silica Gel to the Container
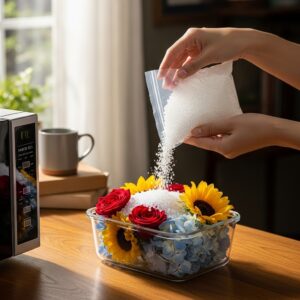
Pour a 1-inch layer of silica gel into your microwave-safe container.
This gel absorbs moisture and prevents petals from burning.
Tip: Avoid using paper towels or napkins — they can stick to petals or cause uneven drying.
Step 3: Arrange the Flowers
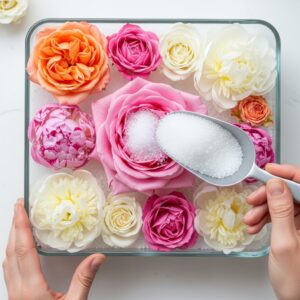
Place your flowers face-up on the layer of silica gel.
Carefully pour more silica gel over the top until the blooms are completely covered. Be gentle to maintain the shape of delicate petals.
Step 4: Microwave Slowly

Place a cup of water inside the microwave (next to your container) to help absorb excess energy and prevent overheating.
Then:
-
Set your microwave to medium heat (around 600–700W).
-
Heat for 30 seconds to 1 minute at a time.
-
Check after each interval to see if the flowers are dry.
Small flowers may dry in 1–2 minutes, while larger ones might take up to 3–4 minutes.
Watch closely: Overheating can cause petals to brown or lose their vibrancy.
Step 5: Cool and Clean

Once flowers look dry, remove the container and let it cool for at least 30 minutes with the lid slightly open.
Then, gently brush off any remaining silica gel with a soft paintbrush.
Step 6: Preserve and Display

Your dried flowers should now look vibrant and feel papery to the touch. To make them last longer:
-
Store in a dry place away from sunlight.
-
Spray lightly with hairspray or floral sealant to protect petals.
-
Display in vases, shadow boxes, or resin crafts.
🌺 Best Flowers to Dry in the Microwave
Some flowers hold up better than others under microwave heat. Here are the top picks:
-
Roses
-
Dahlias
-
Daisies
-
Chrysanthemums
-
Zinnias
-
Carnations
Avoid flowers with thin, delicate petals (like tulips or lilies), as they may shrivel or burn.
🌻 Common Mistakes to Avoid
-
Microwaving too long: Causes browning or brittleness.
-
Skipping silica gel: Leads to faded, shriveled blooms.
-
Using high heat: May destroy color and texture.
-
Not checking frequently: It’s better to stop early and check than to over-dry.
Learning how to dry flowers in the microwave is a fun, quick, and rewarding DIY project.
In just minutes, you can preserve special blooms with their beautiful colors nearly intact.
Perfect for craft projects, keepsakes, or home décor, this method combines convenience with creativity.
With a little care, your microwave-dried flowers will stay gorgeous for months — a lasting reminder of your favorite floral moments. 🌼