Resin art is one of the most beautiful ways to capture nature’s delicate beauty — especially flowers.
But before you pour your resin, your blooms must be completely dry. Any moisture trapped inside can cause flowers to turn brown, moldy, or ruin your resin piece.
In this guide, you’ll learn how to dry flowers for resin the right way — step by step — so they stay bright, dry, and ready for your next resin project.
🌼 Why You Need to Dry Flowers for Resin
When working with epoxy or UV resin, moisture is the biggest enemy. Even tiny traces of water in petals or stems can cause:
-
Bubbles or cloudiness in the resin
-
Decay or discoloration over time
-
Flowers to darken or rot inside the piece
That’s why proper drying is essential — it keeps the flowers’ color, shape, and texture intact for stunning, long-lasting results.
🌸 Best Types of Flowers for Resin
Some flowers dry better and keep their color beautifully. Try using:
-
Baby’s breath
-
Roses (petals or small buds)
-
Daisies
-
Lavender
-
Hydrangea petals
-
Zinnias
-
Pansies
-
Statice
Avoid large, thick blooms (like peonies or lilies) unless you separate their petals — they can trap too much moisture.
🌷 1. Air Drying Method (Natural and Easy)

Best for: Small or delicate flowers like lavender, daisies, and baby’s breath.
Time: 2–3 weeks
What You’ll Need:
-
Twine or string
-
Scissors
-
A dark, dry, well-ventilated room
Steps:
-
Bundle flowers into small bunches using string or twine.
-
Hang them upside down in a dark, airy space (like a closet or attic).
-
Leave them for about 2–3 weeks until completely dry and crisp.
Pro tip: Keep them out of sunlight — UV light fades color fast.
🌺 2. Silica Gel Drying Method (For Vibrant Color)

Best for: Roses, zinnias, and thick-petaled flowers.
Time: 5–7 days
Silica gel absorbs moisture quickly, preserving petals’ natural shape and color — perfect for resin work.
What You’ll Need:
-
Airtight container
-
Silica gel crystals
Steps:
-
Pour a layer of silica gel (about 1 inch) into the container.
-
Place your flowers face-up on top of the gel.
-
Gently cover them with more silica gel until fully submerged.
-
Seal the container tightly and leave for 5–7 days.
-
Once dry, remove gently and brush off excess gel with a small paintbrush.
Tip: Store dried flowers in a zip-lock bag or airtight box until you’re ready to use them.
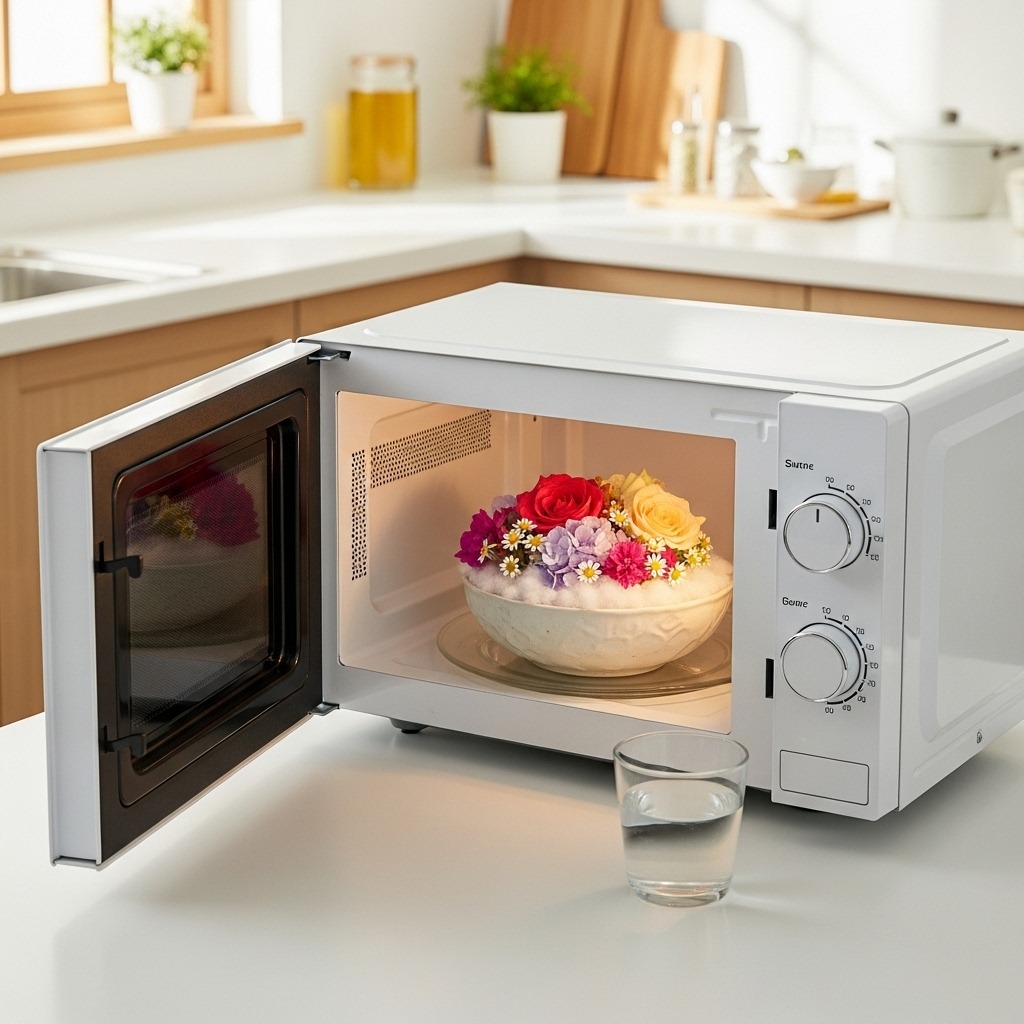
🌻 3. Microwave Silica Gel Method (Fast and Efficient)

Best for: Those who want quick results without fading.
Time: 1–3 minutes per batch
What You’ll Need:
-
Microwave-safe container
-
Silica gel
-
Cup of water
Steps:
-
Add a layer of silica gel to the container and place your flowers on top.
-
Cover completely with more gel.
-
Put a cup of water in the microwave (to prevent overheating).
-
Heat on medium power for 30 seconds to 1 minute.
-
Check often until the flowers feel dry and papery.
-
Let them cool for 30 minutes before removing from the gel.
Result: Flowers retain their color and are ready for resin the same day!
🌹 4. Pressing Flowers (For Flat Resin Designs)

Best for: Bookmarks, coasters, or jewelry with a flat surface.
Time: 1–2 weeks
What You’ll Need:
-
Heavy books or a flower press
-
Parchment or blotting paper
Steps:
-
Place flowers between parchment paper inside a thick book.
-
Stack additional books on top for extra weight.
-
Leave for 1–2 weeks until completely dry and flat.
Pro tip: Pressed flowers look amazing in resin keychains, pendants, and wall art.
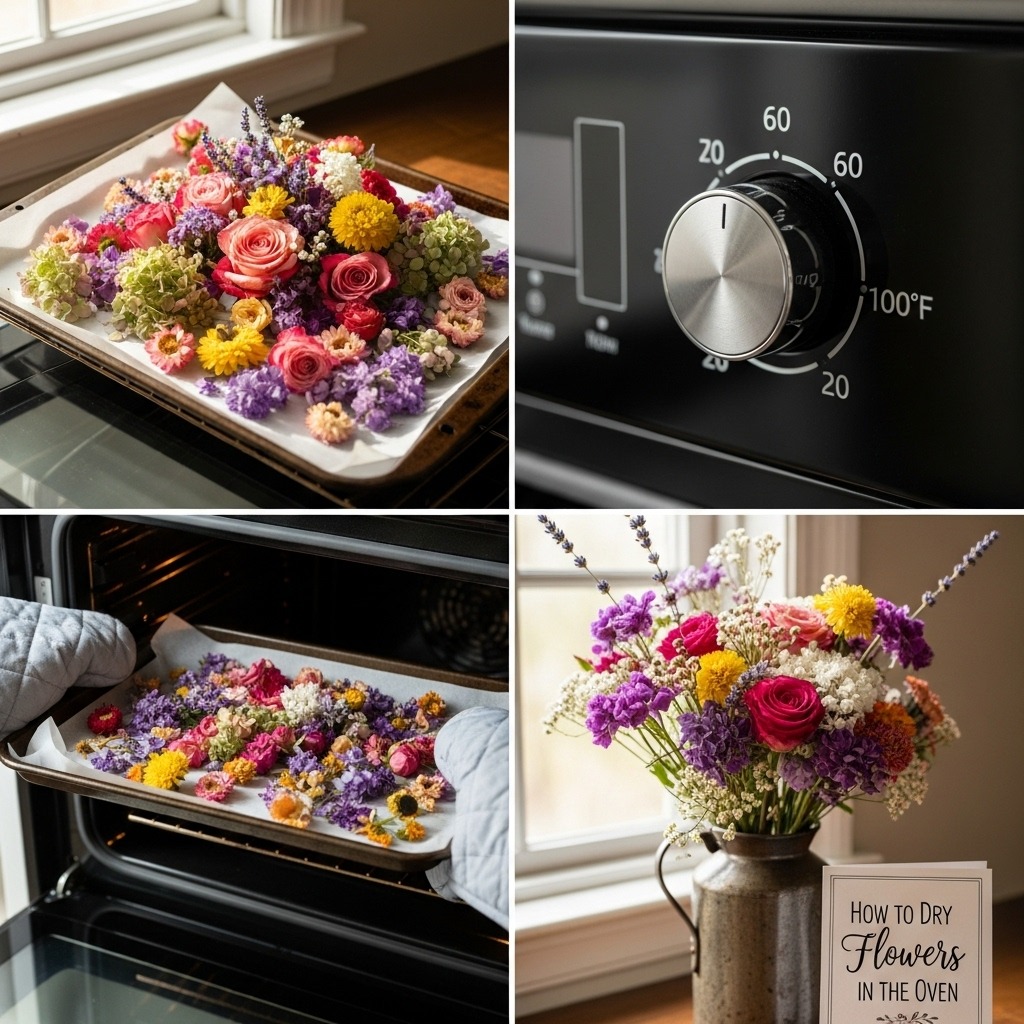
🌼 5. Oven Drying Method (Quick Alternative)

Best for: Hardy flowers that can tolerate heat (like daisies and chrysanthemums).
Time: 1–2 hours
What You’ll Need:
-
Baking tray
-
Parchment paper
-
Oven
Steps:
-
Set the oven to 95°C / 200°F.
-
Place flowers on a parchment-lined tray in a single layer.
-
Keep the door slightly open to allow moisture to escape.
-
Bake for 1–2 hours, checking often.
Warning: Too much heat can cause browning — monitor closely!
🌷 How to Know Your Flowers Are Ready for Resin
Your flowers are fully dried when:
-
They feel crisp or papery to the touch.
-
No moisture remains on petals or stems.
-
Colors look slightly deeper, not faded or brown.
If in doubt: Let them sit for another day or two before using them in resin. It’s better to over-dry than risk trapped moisture.
🌸 How to Store Dried Flowers Before Using in Resin

Once your flowers are perfectly dry, store them properly until you’re ready to use them:
-
Keep them in airtight containers or zip-lock bags.
-
Add silica packets to absorb any humidity.
-
Store in a dark, cool place to prevent fading.
This will ensure your dried flowers stay in perfect condition for your resin projects.
Learning how to dry flowers for resin is the key to creating crystal-clear, professional-looking resin art.
Whether you choose air drying for simplicity, silica gel for color, or microwave drying for speed, the goal is the same — flowers that are completely dry, bright, and beautiful.
With a little patience and care, you can turn your favorite blooms into lasting resin keepsakes that never lose their charm. 🌸